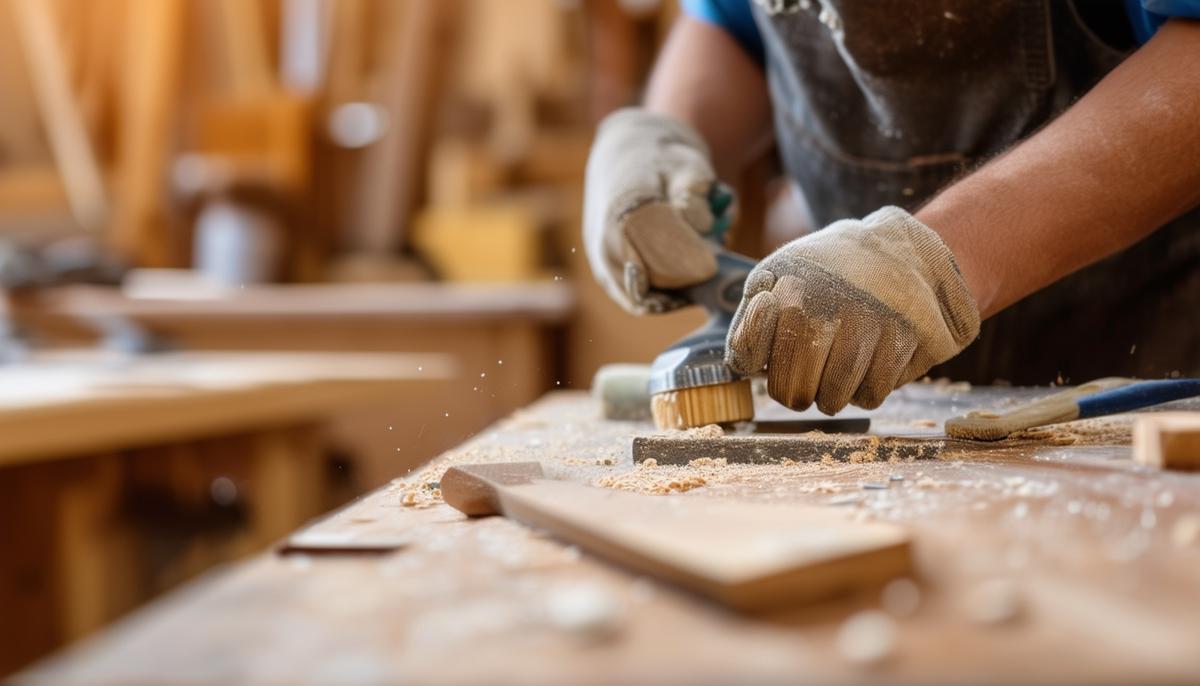
1. Reclaimed Wood
Reclaimed wood offers an affordable and eco-friendly option for your woodworking projects. Scout for old furniture, barns, or pallets instead of heading straight to the lumberyard. These sources often provide high-quality materials with historical charm at minimal cost. Clean the wood thoroughly, remove nails and screws, then sand it down for a smooth finish. Keep an eye out for construction sites and online marketplaces. Networking with local woodworkers might also lead you to new sources.
Before purchasing, always check moisture content with a quality moisture meter to avoid future warping or damage. With some effort in preparing reclaimed wood, you can achieve impressive results without breaking the bank.

2. Shop Sales and Discounts
Take advantage of sales and discounts from hardware stores and online suppliers. Sign up for newsletters for exclusive discount codes and early sale notifications. Time your purchases strategically for events like Black Friday, Cyber Monday, or end-of-season clearances to stock up on materials at reduced prices.
Ask store associates about upcoming sales or bulk discounts, especially for large projects. Building relationships with local suppliers can also lead to special deals or discounts for regular customers. Join woodworking communities to pool resources and take advantage of bulk-purchase discounts.
Don't overlook online marketplaces like eBay or Amazon, which often have competitive prices, especially for bulk buys. Just read reviews and check seller ratings to ensure you're getting a good deal. By strategically shopping sales and discounts, you can stretch your budget further.
3. Offcuts and Remnants
Build relationships with local lumberyards and woodshops to obtain offcuts and remnants that might otherwise go to waste. These small pieces of lumber can be gold mines for smaller projects, hidden parts of larger builds, or even practice work – allowing you to hone your skills without wasting expensive materials.
Businesses are often willing to part with offcuts and remnants at a fraction of the cost, making it a budget-friendly option. Visit your local lumberyard or woodshop, explain what you're looking for, and offer to help clear out their excess materials. Many places will be happy to make a deal, especially if it means turning waste into revenue.
Once you've built these relationships, maintain them by keeping in touch and showing appreciation for the great deals. A little goodwill goes a long way, and you might find yourself getting even better materials or exclusive first picks.
Make good use of what you get. Small pieces of wood can be used for:
- Accents
- Intricate joinery
- Test cuts
- Practice work
By being proactive and resourceful with offcuts and remnants, you can greatly expand your material options without stretching your budget. It's a win-win for both your wallet and your creativity!

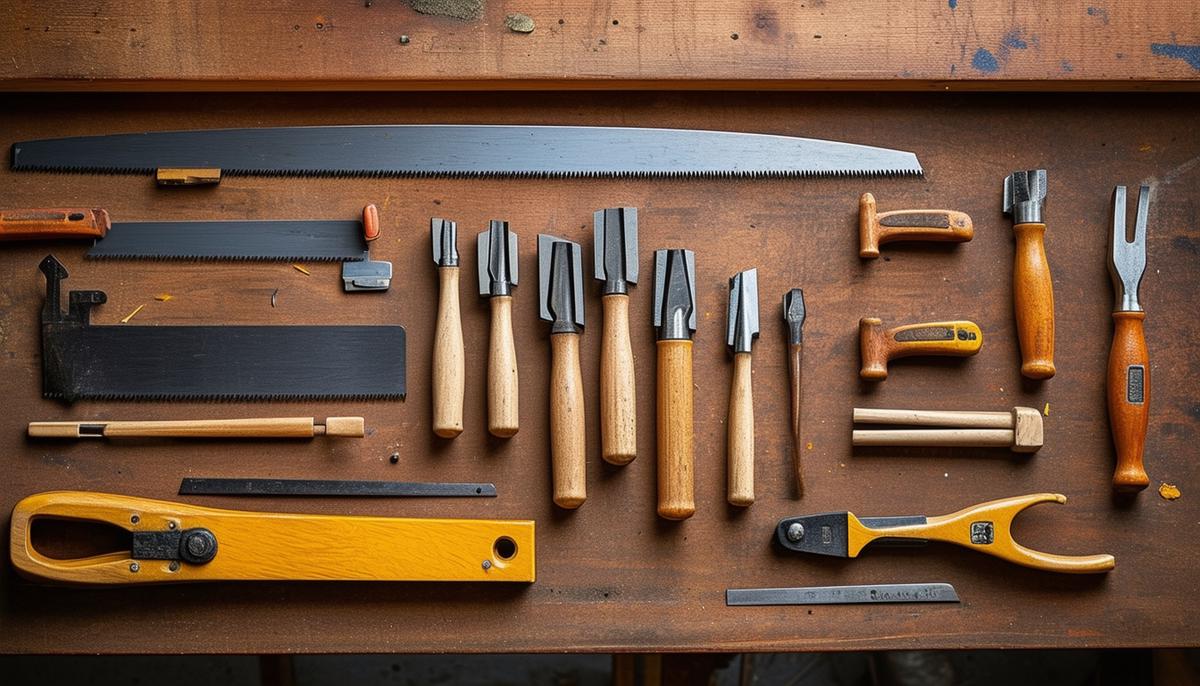
4. Prioritize Essential Tools
When starting out, prioritize essential tools like hand saws, chisels, and clamps instead of splurging on every tool. These foundational tools are practical for a wide range of tasks and will see you through numerous projects.
Invest in high-quality tools from reputable brands like Stanley, DeWalt, and Bosch. The initial investment can save you money and headaches down the line, as high-quality tools are more durable, precise, and require less maintenance.
Hand saws like dovetail and panel saws are indispensable for various cuts. Chisels are a must-have for detail work and joinery. A set of sharp, high-quality chisels can mean the difference between a clean, professional result and a rough, unfinished look. Clamps in various sizes, such as bar clamps, C-clamps, and corner clamps, are essential for holding pieces in place.
Maintain your tools properly by regularly cleaning, sharpening, and storing them in a dry, safe place to extend their lifespan and ensure optimal performance.
Consider buying used tools in good condition from local classifieds, garage sales, or online marketplaces for a more affordable way to build your essential tool kit without compromising on quality.
By focusing on these essential, high-quality tools, you set a strong foundation for all your future woodworking projects, maximizing efficiency and saving money in the long run.
5. Share, Rent, or Borrow Tools
Instead of investing in every tool, consider sharing, renting, or borrowing to save on costs and reduce clutter. Join local woodworking clubs or online forums to connect with others willing to share tools and insights. These communities can be a gold mine for practical advice and access to a broader range of tools than you might afford on your own.
For occasional needs, tool libraries and makerspaces provide access to a wide selection of tools, from basics to specialized equipment, for a limited time or membership fee. Many hardware stores and rental services also offer tool rental programs, ensuring you have what you need for bigger tasks without the commitment of buying.
Before using rented or borrowed tools, ensure they're in good condition. Return them promptly and in the same condition to foster trust and ensure a positive experience for everyone involved.
Sharing, renting, or borrowing tools is not only cost-effective but also fosters a sense of community and collaboration. It's an excellent way to stay connected, save money, and still have access to the best tools for your woodworking projects.

6. Plan Projects Thoroughly
Thorough planning is crucial for successful, resourceful, and rewarding woodworking projects. Start by sketching out detailed drawings or using software programs like SketchUp or Fusion 360 to create precise plans, visualize the final product, and simulate assembly.
Compile a comprehensive list of materials, including the type of wood, dimensions, and even the smallest hardware pieces. Look for opportunities to use scrap or reclaimed materials you already have.
Break your project down into a step-by-step sequence of tasks, each with clear instructions, required tools, and any special techniques. Include estimated time frames for each task to help schedule your work sessions effectively.
For complex projects, create mock-ups or prototypes using cheaper materials like plywood or cardboard to test fit and function before committing to your premium wood.
As your project progresses, monitor its development and adapt your steps and materials list as needed to address any unexpected challenges. Flexibility is key to ensuring small hiccups don't turn into major roadblocks.
Once complete, review what went well and what could be improved to inform your next project's planning process and boost your skills.
By planning your woodworking projects thoroughly, you can avoid unnecessary waste, save on costs, and produce high-quality, sustainable results you're truly proud of.
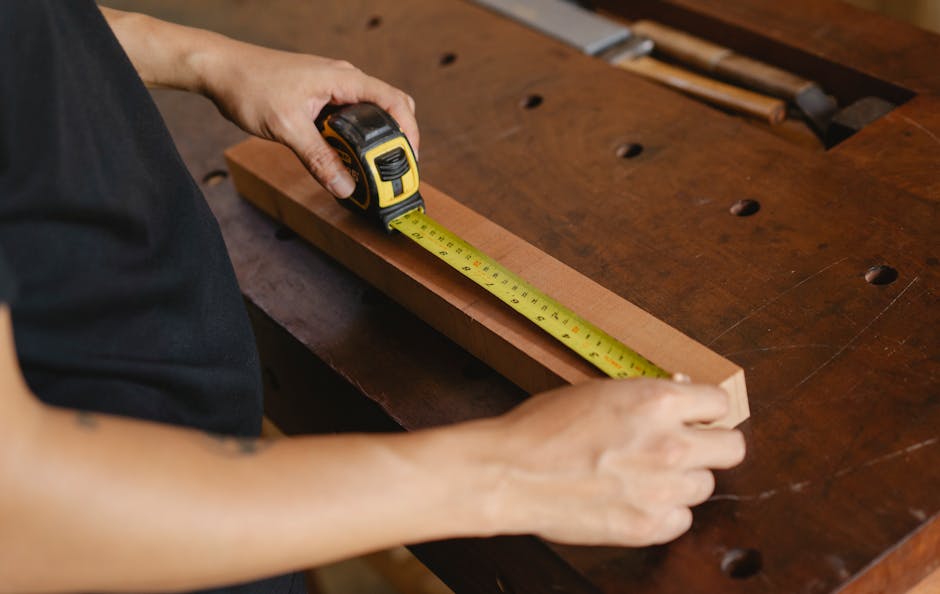
7. Measure Twice, Cut Once
The Precision Mantra
The Importance of Measuring Tools
Investing in high-quality measuring tools can significantly impact the accuracy of your cuts. Tools like measuring tapes, rulers, and squares are foundational for achieving precision. Look for durable, easy-to-read tools with clear markings. Brands like Starrett and Mitutoyo are renowned for their precision and reliability.
Double-Check Measurements
Even with the best tools, human error can occur. That's why it's crucial to measure twice before cutting. This practice minimizes mistakes and ensures pieces fit together perfectly. When measuring wood, note the measurement, then measure again from a different angle or position to confirm. If there's a discrepancy, re-measure until you're confident of the correct measurement.
Mark Intelligently
Clearly and accurately marking measurements is as important as the measurements themselves. Use a sharp pencil or scribing tool for fine lines, and employ a small tick mark to indicate the side where the cut will fall. This accommodates the kerf, or the saw blade's width, ensuring precise cuts.
Use a Stop Block for Repetitive Cuts
For projects requiring multiple cuts of the same length, a stop block is invaluable. A stop block is a simple jig clamped to your saw's fence or table to create a fixed boundary. This ensures identical cuts, saving you from measuring each piece individually and reducing potential errors.
Calibrate Tools Regularly
To maintain measurement accuracy, periodically check and calibrate measuring tools. Over time, tools can wear down or become misaligned. Regular calibration ensures tools remain accurate, so you're always working with precise measurements.
Practice Good Habits
Developing the habit of measuring twice will pay off in every project. Make it a routine part of your process. Whether working on a small DIY project or an elaborate piece of furniture, take a moment to double-check measurements before cutting. This small step can prevent big mistakes, saving you from redoing work or wasting valuable materials.
Maintain a Clean Workspace
A tidy workspace contributes to accuracy and efficiency. Keep measuring tools organized and accessible, and ensure your workbench is clear of debris. A clean surface helps lay out materials more accurately and ensures measurements aren't affected by obstacles or clutter.
8. Use Scrap Wood
Implement a Storage System
Begin by dedicating a space specifically for scrap wood. Shelves, bins, or even a simple cardboard divider construction can work wonders in keeping scraps organized. Sort pieces by type, size, and suitability for future projects. This makes it easy to locate the right piece when needed and prevents clutter in your workshop.
Categorize by Size and Type
Organize scraps into categories like small offcuts, long strips, and larger chunks. Additionally, sort by wood type—hardwood, softwood, plywood, etc. This categorization streamlines your workflow and helps you quickly gauge what you have on hand before purchasing new materials.
Utilize for Smaller Projects
Scrap wood is perfect for smaller projects that can add functionality and beauty to your home or workshop. Think about making items like coasters, picture frames, birdhouses, and small shelving units. These projects are often quick and satisfying, making excellent use of wood pieces that might otherwise go to waste.
Add Unique Accents
Accents made from scrap wood can elevate the look of your larger projects. Use smaller pieces to create inlays, decorative trims, or custom handles and knobs. The unique grain patterns and character in scrap wood can add a personal and distinctive touch, often rivaling the look of expensive, store-bought accents.
Practice and Prototyping
Scrap wood is excellent for practice and prototyping. Before diving into your main project with expensive materials, use scrap pieces to test cuts, fittings, and finishes. This practice can save you from costly mistakes and improve your confidence and precision.
Environmental Benefits
Utilizing scrap wood minimizes waste and supports sustainability efforts. Every reused piece is one less piece contributing to landfill or requiring new trees to be harvested. By promoting eco-friendly practices, you save money and contribute positively to the environment.
Simple Craft Projects
Scrap wood projects can be a fun activity for families and kids. Simple crafts like DIY puzzles, wooden toys, and holiday decorations can be made from small wood pieces. These projects are enjoyable and teach valuable skills and the importance of recycling materials.

9. Streamline Workflow
Cut All Pieces Before Assembly
One efficient practice is to prepare all components before beginning assembly. Start by thoroughly planning and cutting every piece as outlined in your project drawings. Cutting all pieces at once ensures uniformity and accuracy across your entire project. This method reduces interruptions, allowing you to focus on assembly without pausing for additional cuts.
Maintain an Organized Workspace
Keeping your workspace clean and organized enhances your ability to work efficiently and safely. Invest in storage solutions like pegboards, tool racks, and shelving units to keep tools and materials neatly arranged and within reach. Labeling storage bins and categorizing tools and supplies make locating what you need easier, reducing downtime spent searching.
Prioritize Tool Maintenance
A well-maintained tool is more reliable and effective. Regularly clean, sharpen, and inspect tools to ensure optimal condition. Dull blades, for instance, can lead to inaccurate cuts and potential hazards. Keeping tools in top shape minimizes delays due to equipment failure and ensures precision.
Plan Workflow Steps
Detailing the task sequence in your project plan can greatly enhance efficiency. Break down the project into clear, manageable steps and follow this sequence rigorously. This approach helps maintain focus and prevents skipping necessary actions or taking steps out of order, which can lead to mistakes and rework.
Utilize Assembly Jigs and Fixtures
Jigs and fixtures are invaluable for ensuring consistent results and speeding up repetitive tasks. Custom jigs can help align pieces accurately for drilling, cutting, or assembling, improving precision and reducing setup time. They are especially useful for batch processing multiple identical components.
Optimize Material Handling
Efficient material handling can save significant time and labor. Arrange materials and workstations to minimize distance and effort required to fetch and process materials. If space permits, consider setting up rolling carts or tables to move materials and tools between work areas easily.
Implement Just-In-Time Assembly
Just-in-time (JIT) assembly means assembling parts only when needed in the workflow. This tactic reduces clutter and allows better space management in your workshop. It also means fewer chances of parts getting lost or damaged before use, creating a smoother workflow.

10. Use a DIY Moisture Meter
Verifying the Wood's Moisture Content
Wood is a hygroscopic material that absorbs and releases moisture, causing it to swell, shrink or crack. Ensuring the right moisture level before use prevents warping, splitting, and joint failures in your woodworking projects.
Why Moisture Content Matters
Too much moisture can make wood swell, while too little can cause it to shrink or crack. When wood with high moisture content is used, it can lead to warping, splitting, and joint failures as it dries and contracts. Similarly, dry wood is prone to absorbing moisture, swelling and compromising your woodwork's integrity.
The Role of a Moisture Meter
A moisture meter accurately measures the wood's moisture content, helping you determine if it's suitable for use. Ensuring the optimal moisture level for your project and environment prevents issues like warping and ensures your piece stands the test of time.
DIY Makeshift Solutions
If you can't invest in a professional moisture meter, try using a hygrometer to get a general idea of the wood's moisture content based on ambient humidity. Another option is the "baking method" – cut a small piece of wood, weigh it, bake it at low temperature to remove moisture, then re-weigh it. The weight difference gives an estimate of the moisture content.
Using a Moisture Meter
Using a moisture meter is straightforward – place the pins or sensor on the wood's surface, and it will display the moisture content. Test multiple spots for consistent readings.
Aim for moisture content that matches the final location – 6-8% for indoor furniture, 9-14% for outdoor projects.
Investing in a professional moisture meter from brands like Wagner, Delmhorst, or General Tools is advisable for serious woodworkers. It ensures accuracy, prevents waste, and helps maintain the stability of your projects.

11. Reclaim Hardware
Reclaim Hardware for Budget-Friendly, Unique Projects
Reclaiming hardware from old furniture adds character and functionality to your woodworking projects while saving money.
Where to Find Reclaimed Hardware
Look for old furniture at:
- Yard sales
- Estate sales
- Thrift stores
- Online marketplaces
Items that are worn but have sturdy, interesting hardware are goldmines.
Removing Hardware Carefully
Use screwdrivers or drills to gently remove screws, hinges, and handles, taking care not to strip or damage them.
Cleaning and Restoring
- Soak hardware in soapy water to remove dirt and grime.
- Use a wire brush, steel wool, or vinegar and baking soda for tougher residues and rust.
- Polish with metal polish for a shine or leave some patina for an antique look.
Incorporating into Projects
Reclaimed hinges and handles add vintage flair to cabinets, drawers, and doors. Old screws and fasteners are often higher quality than modern options. Get creative – mismatched handles can add an eclectic touch, and old hinges might inspire retro-style cabinets or jewelry boxes.
Reclaiming hardware is cost-effective, adds distinctive character, aligns with sustainable woodworking practices, and allows you to incorporate history into your work.

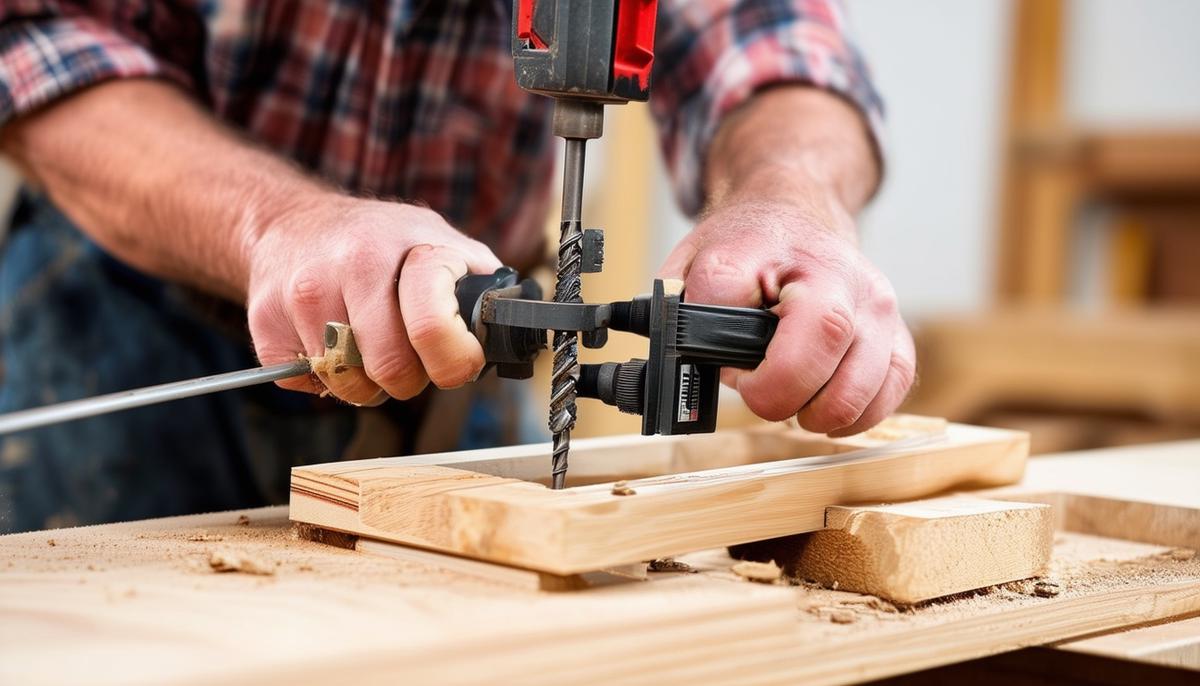
12. Create DIY Jigs
Enhance Precision with DIY Jigs
Repetitive tasks like drilling, cutting, and aligning can be tedious and error-prone. DIY jigs are simple, cost-effective tools that improve accuracy and efficiency.
Benefits of DIY Jigs
Jigs ensure consistency in tasks like making multiple cuts or drilling holes. Creating your own allows customization to suit your specific needs without the high cost of commercial options.
Common Jig Types
- Drill Jigs: Guide drill bits for precise hole locations and depths.
- Cutting Jigs: Guide saws for straight, angled, or repetitive cuts.
- Alignment Jigs: Ensure perfect alignment when assembling projects.
Materials and Tools
Most jigs can be made from plywood, MDF, or scrap wood, requiring basic tools like saws, drills, screws, and clamps.
Creating a Drill Jig
- Plan the task and required hole sizes/spacing.
- Design a sketch with dimensions.
- Cut the base piece.
- Attach guide blocks for the drill bit.
- Position and clamp the jig, then drill through the guides.
Enhancing Jigs
Add adjustable stops, movable guides, or dust collection ports to increase functionality.
Using Jigs Effectively
Clamp jigs securely, practice on scrap material, and make adjustments as needed. Incorporating jigs boosts accuracy, speeds up production, and allows tackling complex projects confidently.
DIY jigs optimize workflow, minimize waste, and make woodworking tasks more enjoyable while improving precision at a fraction of the cost.
13. Homemade Clamps
### Ratchet Straps: A Versatile SolutionRatchet straps, commonly used for securing loads during transport, make excellent substitutes for traditional clamps. They provide strong, adjustable pressure and can hold workpieces of various sizes and shapes. To use ratchet straps effectively:
- Protect Your Wood: Insert a layer of cardboard or scrap wood between the strap and the workpiece to distribute pressure evenly and prevent damage.
- Positioning: Lay your workpieces and wrap the ratchet strap around them, positioning it to apply even pressure across the surfaces you want to bond or hold steady.
- Tightening: Use the ratchet mechanism to gradually increase the tension, avoiding overtightening to prevent damage or misalignment.
- Securing: Once the desired tension is achieved, double-check the alignment and adjust as necessary. The ratchet strap should hold everything firmly in place.
Additional Homemade Clamp Ideas
- Rope and Wedges: Use strong rope and wooden wedges to create tension, wrapping the rope around your workpieces and inserting wedges to tighten and secure the assembly.
- Bungee Cords: For lighter clamping needs, bungee cords can provide adequate tension and flexibility, easily wrapping around various shapes.
- PVC Pipe Clamps: Construct pipe clamps using PVC pipes, T-joints, and adjustable screws, customizable to different lengths for larger or irregularly shaped workpieces.
- C-Clamps and Scrap Lumber: Combine small C-clamps with scrap lumber to extend their reach and versatility, attaching the C-clamps to the scrap lumber for a makeshift clamping surface.
Practical Tips for Homemade Clamps
- Inspect for Fit: Test your homemade clamps on scrap wood to ensure they hold securely without causing damage, adjusting as needed.
- Distribute Pressure Evenly: Ensure pressure is applied evenly across the workpieces to avoid warping or misalignment, especially with soft or delicate woods.
- Stay Safe: Handle homemade clamps with care, mindful of potential pinch points and ensuring all components are secure before applying tension.
Homemade clamps like ratchet straps and other creative substitutes are excellent solutions for woodworkers seeking to save money without compromising quality. By adapting readily available materials, you can tackle a wide range of clamping needs while protecting your wood and maintaining precision.

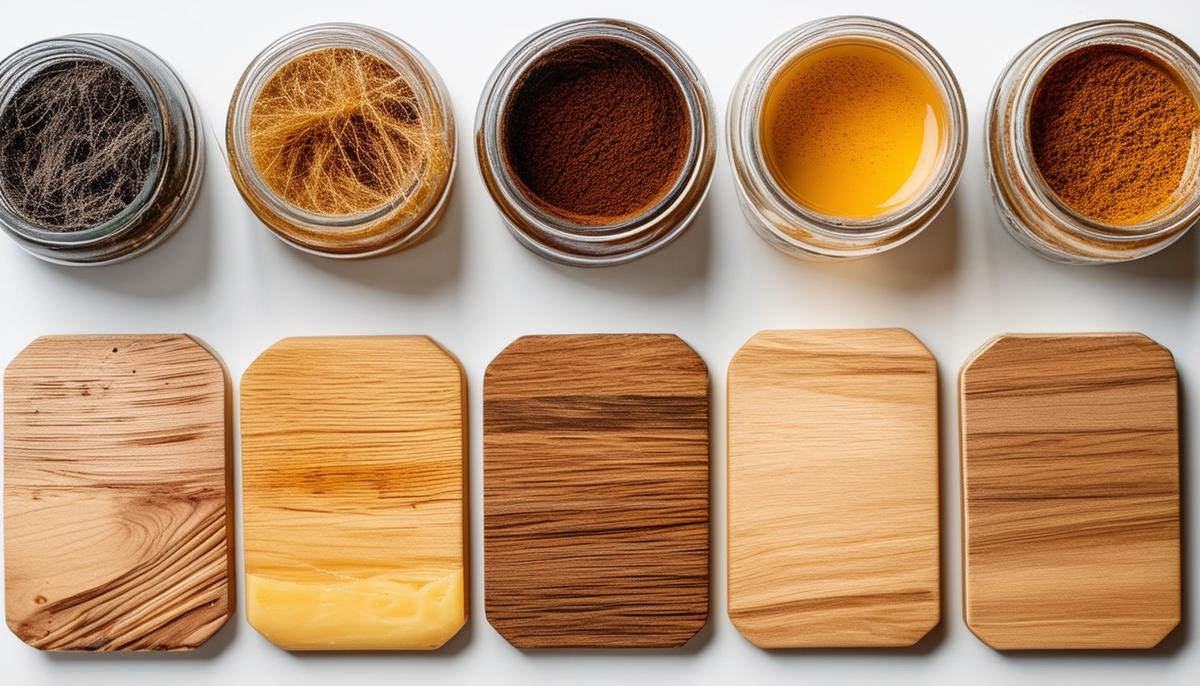
14. Budget-Friendly Finishes
Vinegar and Steel Wool Stains
Creating your own wood stain using vinegar and steel wool produces a range of rich, rustic tones for a distinctive aged look:
- Preparation: Tear steel wool into pieces and place them in a jar, pouring vinegar over the steel wool to fully submerge it.
- Waiting Period: Let the mixture sit for at least 24 hours, letting it reach its full potential after a few days.
- Application: Using a brush or rag, apply the vinegar and steel wool mixture to your wood. Test on a scrap piece first to gauge the color outcome.
- Finishing Touches: After the stain dries, consider adding a clear finish to seal and protect the wood.
Beeswax and Olive Oil Polish
A mixture of beeswax and olive oil nourishes the wood and brings out its natural beauty with a subtle sheen:
- Making the Polish: In a double boiler, melt beeswax, then stir in olive oil at a ratio of approximately one part beeswax to three parts olive oil.
- Storage: Pour the mixture into a clean container and allow it to cool and solidify, storing it in an airtight container.
- Application: Using a soft cloth, rub the polish onto the wood in a circular motion, allowing it to soak in.
- Buffing: After applying, buff the surface with a clean cloth, revealing a lovely, natural shine.
Coffee and Tea Stains
Coffee or tea can impart warm, earthy tones to your wood projects:
- Brewing and Preparation: Brew a strong pot of coffee or tea, with stronger brews yielding darker, more intense stains.
- Application: Apply the coffee or tea to your wood using a brush or rag, letting each coat dry before applying the next for desired depth.
- Sealing: After the wood has dried, seal it with a clear finish to protect the stain.
Using household items like vinegar, steel wool, beeswax, olive oil, coffee, and tea provides a rich, natural finish that enhances the beauty of your wood while saving you money.
15. Tool Maintenance
Maintaining your tools is essential for ensuring their longevity, performance, and cost-effectiveness. Proper maintenance not only reduces the need for costly replacements but also guarantees your tools operate at their best.
Routine Cleaning
After each use, clean your tools to remove dust and debris that can lead to rust and decreased effectiveness. Use a soft brush, air compressor, or rag to remove sawdust and dirt.
Lubrication
Regularly apply appropriate lubricants to moving parts like blades, gears, and bearings to prevent friction, overheating, and premature wear.
Sharpening Blades and Bits
Regularly sharpen saw blades, chisels, and drill bits for clean, precise cuts and reduced strain on your tools. Use sharpening files, stones, or dedicated sharpening tools.
Rust Prevention
Store your tools in a dry, climate-controlled area, and consider using silica gel packets or rust-inhibitor sprays to protect them from moisture. Apply a thin layer of oil to metal surfaces after cleaning.
Inspection and Adjustment
Regularly inspect your tools for wear and tear, tightening loose components and replacing damaged parts promptly. Ensure electrical connections are secure and wires are not exposed.
Proper Storage
Use toolboxes, pegboards, or storage cabinets to keep your tools organized and easily accessible, storing them in a way that prevents damage or exposure to harmful elements.
Record Keeping
Maintain a maintenance log to stay on top of regular care and identify patterns in tool usage and wear, ensuring no tool gets neglected.
Professional Servicing
For complex tools, regular professional servicing by experienced technicians can catch potential issues early and keep your tools running safely and efficiently.
By following these maintenance practices, you can extend the lifespan of your tools, enhance their performance, and ultimately save money by avoiding frequent replacements.
By adopting resourceful practices like using reclaimed wood or maintaining your tools properly, you can enhance your woodworking projects without overspending. Thoughtful planning and smart choices are key to successful woodworking.
Leave a Reply