Evaluating Indoor Light Sources
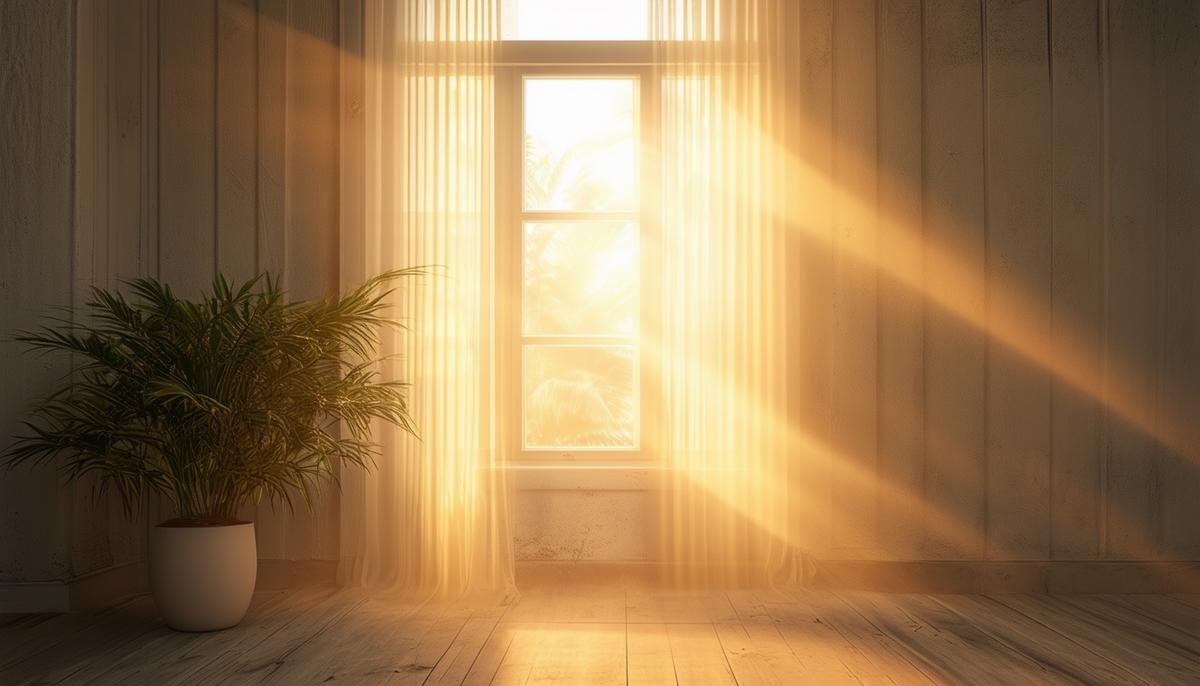
Assessing indoor light sources is crucial for photography, especially when aiming to achieve visually stunning results within confined spaces. When evaluating the natural light within a room, pay attention to windows and how they influence the mood and intensity of a scene.
Sunlight streaming through can vary greatly depending on the time of day and weather conditions, each offering distinct effects. Soft, diffused sunlight lends a more flattering, ambient glow suitable for portraits or detailed shots.
Artificial lights introduce another layer to the illumination equation. Overhead lights, lamps, or recessed lighting on ceilings often cast challenging shadows or influence the warmth or coolness of an image. The strategy for controlling these light sources involves moving your subjects to minimize harsh shadows or to flatter features optimally.
Different artificial lights emit varying color temperatures that can dictate the white balance settings necessary on your camera. Fluorescent lights often skew cooler, while incandescent bulbs emit a warm, yellowish hue, impacting the overall palette of your images. Understanding and adjusting to these nuances are important for achieving natural-looking coloration and maintaining consistency across different shots at the same location.
Both the type and position of light sources significantly shape how we perceive texture and details within the photograph. Hard light from a small source can highlight intricate textures but can be too severe for some faces or softer subjects. By maneuvering your varied indoor light opportunities, you can enrich the aesthetic quality and artistic value of every shot you compose. Experiment with these elements as each new light scenario can unlock a fresh perspective in your photography.
Positioning and Using Key Lights Effectively
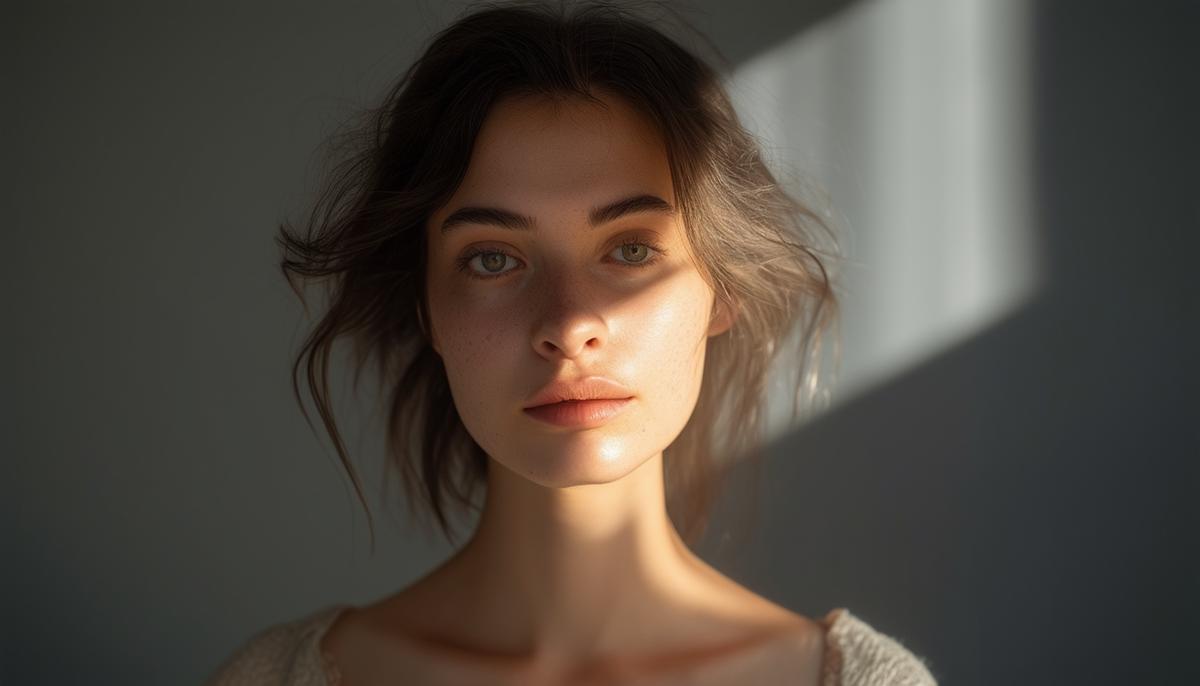
Positioning key lights effectively is an essential skill in crafting beautiful indoor photographs. The artful placement of your main light, whether it's a natural source such as a window or an artificial light such as a softbox, can transform your portraits from flat to visually appealing.
In indoor photography, windows frequently serve as excellent natural key lights. Placed either directly in front or softly to the side of your subject, they diffuse an even, natural light, providing a one-stop solution for brightness and depth. If the direct sunlight is too harsh, consider using diffusive methods such as curtains or sheer fabrics to soften the light and flatter the subject's features. Positioning the subject to be side-lit by the window creates wonderful dimensional shadows, adding mood and character depth to your photographs.
Artificial lighting setups offer increased control. When working with studio lights, remember positioning is pivotal. A common technique is the 45-degree angle rule, where the key light is set at 45 degrees to the subject, accentuating detail while minimizing unflattering facial shadows. This angle enhances the subject's natural curves and contours without being overwhelming. Adjusting the height of the light so it comes down slightly from above can simulate a more natural look similar to sunlight, revealing captivating facial expressions and celebrated features.
The exploration of intensity is also important, where subtlety often reigns supreme. The interplay between light and shadow should be balanced, with softness and contrast where necessary. Consider using a dimmer or softbox to tweak artificial light intensity for that ideal saturation in your photographs. Effective key lighting isn't just technical; it's a thoughtful interplay of light modulations that celebrate your subject vibrantly amidst their surroundings.
Whether basking in the glow through a window or illuminated under strategically positioned artificial lights, fine-tuning your key lights extends beyond mere setup. It's about evoking emotion and bringing stories to life with each calculated adjustment of angle and every subtle shift in intensity. This nuanced command of light paves the way to technically sound and emotionally resonant pictures.
Controlling Color Temperatures and White Balance
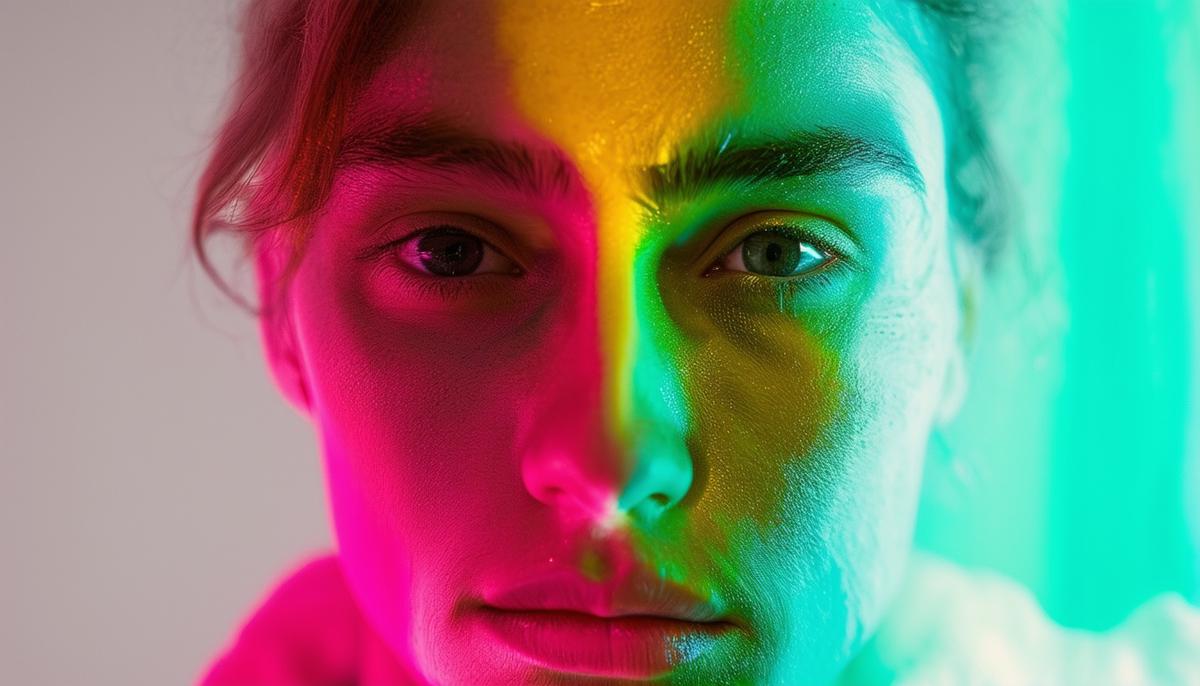
Mastering color temperatures and the intricacies of white balance can elevate your indoor photography, ensuring images sparkle with clarity and charm. This journey involves the selection of lighting tools, skillfully combined with camera settings tailored to capture the essence of your scene.
Understanding color temperatures in photography is crucial – you need the right balance of warm and cool tones to create harmony. Various sources of light emit different kinds of light, each with their own specific color temperature, measured in kelvin (K). Lower kelvin numbers reflect warm colors like the amber hues emitted by candles (around 2000K), while higher numbers lean towards cool colors like the blue of a clear sky (about 10000K).
- Candlelight: Around 2000K, warm amber hues
- Incandescent bulbs: Around 2700K-3000K, warm yellowish light1
- Fluorescent lights: Around 4000K-5000K, cool white light2
- Daylight: Around 5500K-6500K, neutral white light3
- Clear blue sky: Around 10000K, cool blue tones
For indoor shoots, these variances manifest vividly, demanding attention. Mixing different kinds of light sources without adjustment can result in a clash of disagreeable colors. Imagine a scene lit by both the orange glow of incandescent bulbs and the stark daylight streaming through an open window; uncalibrated, this can cast a tangle of color temperatures causing faces to appear distractingly off-color.
To handle this colorful complexity, photographers manipulate white balance – a powerful tool within your camera's arsenal. Its purpose is to adjust the colors so that the image casts natural tones despite the variety of light colors from different sources. It's like adjusting your eyes to seeing a white paper as white, whether under the rosy light of sunset or the azure shades of noon.
Begin the balancing act by scoping out your light environment. Engage either custom or preset white balance settings based on your light source to restore original colors. Think of this as matching realities, ensuring what you capture adeptly mirrors what you behold.
Sometimes, authenticity calls for briefly straying from precise color balancing to explore artistic expression, like opting for a white balance setting that emphasizes cool or warm tones, nurturing the mood of your work. For photographers ready to explore color theory, manual white balance offers untrodden ground for creativity. Here, you can adjust settings by selecting the kelvin numbers, infusing your imagery with flavors of realism or surrealism, depending on your artistic vision.
Paint your visuals with spot-on white balance and adhere to this harmonic understanding of color temperatures. Lead your audience seamlessly through narrative corridors that are comfortably familiar yet boldly enchanting. In composition, let not an unsightly color cast cloud your canvas, but refine your skills to weave warmth and coolness into snapshots that resonate with your unique visual melody.
Experience top-notch AI content creation with Writio! This article was crafted by Writio.
- Nikon. Understanding Color Temperature and Three-Dimensional Color Space. Nikon. Accessed May 20, 2023.
- Cambridge in Colour. Fluorescent Lights and the Color of White. Cambridge in Colour. Accessed May 20, 2023.
- Garg R. Color Temperature and White Balance. Pixpa. Published March 21, 2022.
Leave a Reply